Nexus eFinder takes off
Serge and I have been working flat out to get the Nexus eFinder ready for its big launch. There is a lot to bringing out a new product, testing, manuals, photos, etc, etc. First supplies hit the US distributor over Xmas, and 2 weeks later they have sold out!
Early feedback is just what we wanted to see - users pointing their scopes with pinpoint accuracy!
Perhaps uniiquely in astronomy gear, we have made available the design for DIY build, including being able to buy the custom daughterboard.
2025 Star Parties
Just back from my last star party of 2025. This year the UK weather showed its influence with a lot of cloud and rain. I can remember sometimes we have had so many clear nights I had to go to bed under a clear sky exhausted, so we have to take what we get. No matter what the weather they are still an opportunity to chill out with friends.
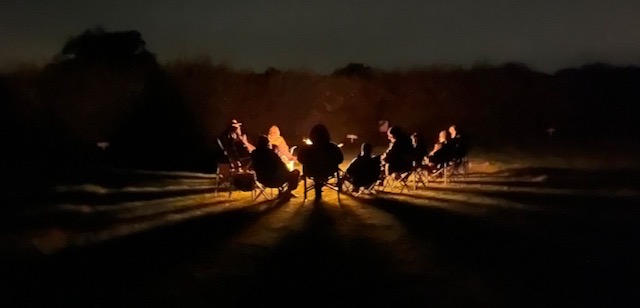
Last week at Haw Wood Farm it started poor, and our Saturday night campfire was keenly supported. Photo by Derek Rowley.
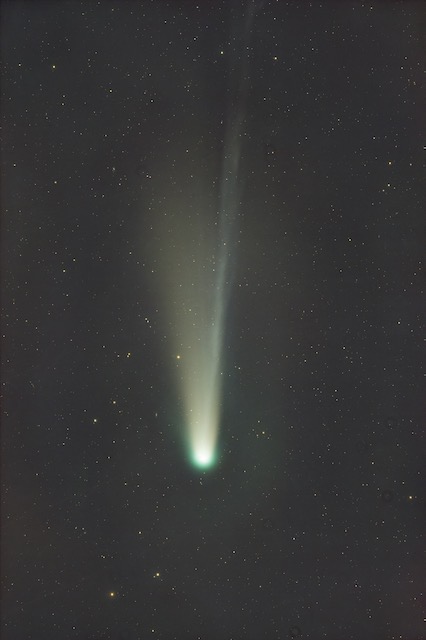
A highlight was comet Lemmon C/2025 A6 which we caught in-between the clouds on at least three nights. Image here taken by John Fathers.
I managed to test the Nexus eFinder prototypes under a variety of sky conditions, which is an important step towards their full release as a product.
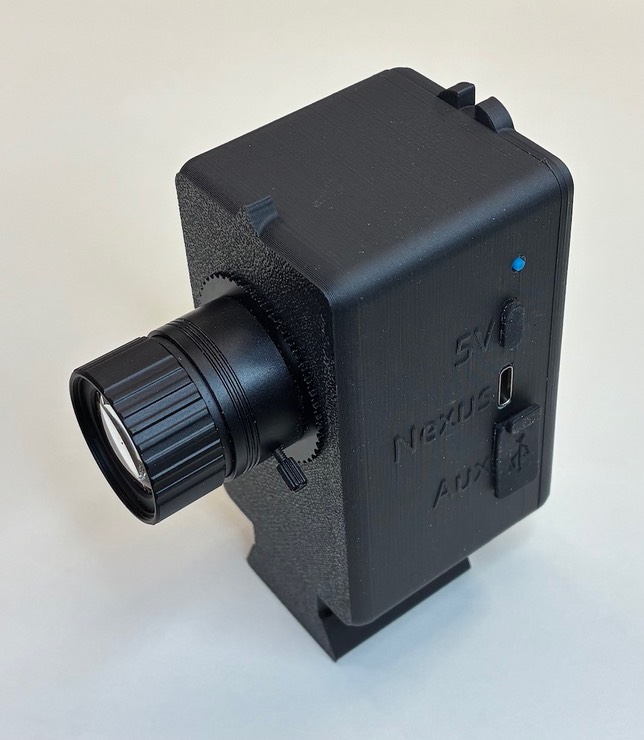
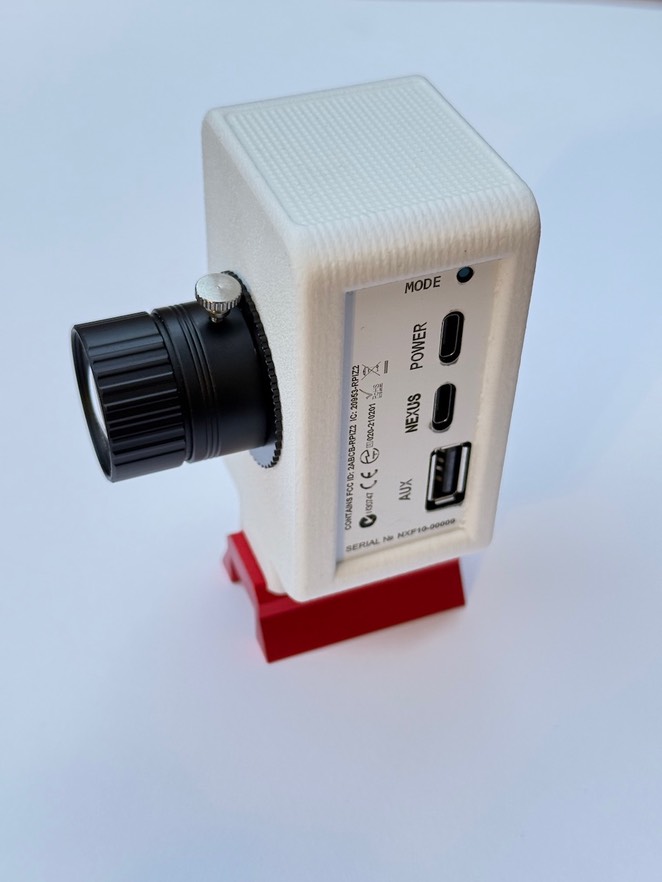
Nexus eFinder
I’ve been working with Serge at AstroDevices for many years. First to integrate ScopeDog, then the various eFinder developments. He really is a knowledgeable and helpful person.
It is clear that more and more visual astronomers are starting to adopt plate-solving finders for their scopes. Other than eFinder there are - Celestron Starsense Explorer, then PiFinder and now others are emerging.
With the close integation already achieved it was kind of obvious to Serge and myself that we should integrate the eFinder controls and display into the Nexus DSC Pro itself. The result, now ready, is the Nexus eFinder …

With a single USB cable to the Nexus DSC Pro, and all the functionality of previous eFinders (plus full ServoCat & Sky Tracker support), it really is a neat add-on.
As well as assisting with the initial 2-‘star’ alignment process, the key benefit of the Nexus eFinder is being able to sync the Nexus DSC Pro to true sky RA & Dec at any time. No more moving off to perform a Local Sync on a nearby bright star!
You can now have the dynamic responsiveness of the encoders, with the sub-arc minute accuracy of plate-solving. The plate-solve is in fact accurate to about 15 arc seconds, but flexure in the telescope OTA will always add some error.
As with previous models, it has a ’Live’ mode where without a Nexus DSC Pro, it transmits telescope position to SkySafari over wifi.
It will be available both as a DIY build, and ready assembled by AstroDevices.
Look - no encoders!
I’ve hinted in previous blogs and articles that I thought plate-solving might replace encoders, at least in some installations. Encoders are great - they give a near instantaneous readout of position, but that position can be subject to many errors in practice.
PiFinder is a good example of a plater-solving finder scope. It works well, has its own library of objects and can feed SkySafari over wifi. It’s available as a kit and is gaining popularity with the ‘push-to’ telescope users. As I have described before, a breakthrough has been the Tetra and Cedar plate-solvers. Set up well, these can solve a 100ms exposure in around 10ms on a Raspberry Pi. The only limitation is ensuring the scope is still for the exposure. Celestron StarSense is another popular example.
Inspired by PiFinder success I decided to produce encoder-less variants of eFinder & ScopeDog. Having a Nexus DSC is still preferred, but these new variants offer a work around if your Nexus DSC is ‘having issues’, and a way of getting setup and observing ultra fast, or just not using a DSC at all.
‘eFinder Live’
My first application is eFinder Live. This is actually just an eFinder Lite with a gps module installed. If on power up if fails to find a Nexus DSC connected, it reverts to ‘Live’ mode. Here it continuously plate-solves (sensing if the scope is moving or not) and feeding SkySafari over wifi. Under typical skies it can cycle through an image capture and solve in less than a second. It could be faster but I am using a Pi Zero to keep the power consumption, size and cost down. The gps module is needed as normally I get location and datetime information from the Nexus DSC on startup. If you select a target on SkySafari, the eFinder display indicates how far to push the scope to reach the target.
Using it in practice, I initially really missed the responsiveness that encoders deliver, but after a while I got used to that and found the accuracy of pointing more than made up for it. Not having to install encoders and use a DSC is clearly an advantage for some, and a big cost saving.
‘ScopeDog Lite’
Spurred on by eFinder Live I decided to tackle ScopeDog. The principle here is to use the stepper motor drives to maintain a virtual encoder calculation of telescope position. The virtual encoders are ‘synced’ to real sky using plate-solving when needed. Like with eFinder Live, the sync is fast and is made a part of the goto sequence. Hence any conventional 2-star alignment process is not needed - instead of initially doing a 2-star alignment and trying to maintain that accuracy over a session, the alignment is done at the point of target observation. As with eFinder Live a wifi feed to SkySafari is maintained and this can be used to command goto’s and slew the scope. Comparing the various ScopeDog goto performances …
- ScopeDog GoTo: Scope slews to target position based on Nexus DSC readout. Will add any iterations necessary to get within the desired positional accuracy. These iterations are very fast, but ultimately depend on the accuracy of the Nexus DSC readout. In practice the error is often about 5-10 arc minutes.
- ScopeDog GoTo++: Scope slews to target position based on Nexus DSC readout. A plate-solve then accurately syncs the Nexus DSC to real sky and one or two more goto iterations are automatically performed. Overall this takes about 2 seconds longer than the standard ScopeDog GoTo, but the final positional accuracy is only really limited by the drive backlash. My own 18” gets to within about 15-30 arc seconds!
- ScopeDog Lite: Scope slews to target position based on virtual encoder estimate. A plate-solve then accurately syncs the virtual encoders to real sky and one or two more goto iterations are automatically performed. Time and accuracy are about the same as for ScopeDog GoTo+
ScopeDog has a puppy!
I bought a Seestar50 a while ago, mostly out of technical curiosity as I'm not going the astrophotography rabbit hole. Its quite an impressive piece of kit I think. It can produce fairly decent images in a few minutes, even under quite poor skies.
Over the last couple of days I have been playing around with its wifi interface. There's enough information out there by hackers to take complete control over the Seestar.
So a new ScopeDog feature is now being tested (when it clears here!). Press a button on the ScopeDog Handbox and the Seestar slews to the ScopeDog coordinates and starts imaging. It carries on until stopped manually, or another target is requested. So at the end of the session the Seestar has a library of images representing your visual observing session. Seestar images are tagged with name and time too
So I just place my Seestar near me when observing and me and my ScopeDog now have an observing buddy - 'ScopePup'
While testing, I found the Seestar wifi hotspot to be a very effective router. So you can configure the ScopeDog to auto connect to Seestar then you can access ScopeDog if needed via the Seestar.
ScopeDog Lite proves interesting
Adding plate-solving into the ScopeDog drive opens new opportunities.
One that is proving very popular is a ‘Lite’ mode. Now if ScopeDog on powering fails to find a Nexus DSC connected, it will reboot into Lite mode, (direct boot to Lite is also possible). Lite mode employs three operating principles …
- Stepper motor step counts are used to build a virtual encoder model for both axes.
- The virtual encoder is syncronised to real sky by the plate-solver.
- ScopeDog generates a wifi feed for Apps like SkySafari, providing a real time display of scope position, plus control via on screen move, goto and align functions.
The plate-solve syncronisation can be manually triggered from the ScopeDog sandbox, or SkySafari. It s also automatically triggered as part of a goto operation.
Physically the hardwire is the same as for standard ScopeDog, albeit without a Nexus DSC, but with a usb GPS dongle plugged into the third ScopeDog control box usb port.
At this stage, the virtual encoder model is a simple one purely based on motor steps and takes no account of any mount tilt. Hence in general the virtual encoder will not be very accurate as you move the scope away from a syncronisation point. However a ‘sync’ will quickly remove any error, and indeed produce a position fix more accurate than any conventional axis mounted encoder system. A ‘sync’ takes about a second or so.
I am starting to code a ‘learning’ feature by which ScopeDog Lite uses the plate-solves at the start of an observing session to add mount tilt and possibly cone error to the virtual encoder model. This is stretching my maths skills and may take a while! If you are interested in the maths look here.
Successful Star Party
Just back from the autumn star party at Kelling Heath. 4 nights out of 7 were at least partly clear - a couple really good. Considering its October in the UK that is quite remarkable.
10 days before going, I decided to rebuild the base of my 18” scope using the new harmonic strain wave gearboxes on the stepper drives. I also tidied up the build making use of my 3d printer. Photo of new base.
I was a bit nervous as I hadn't been able to test anything before the star party. But I needn't have worried. The new build and especially the new gearboxes performed outstandingly well. Very smooth and precise motion. No visible backlash and goto++ accuracy was about 10 arc seconds with respect to true sky RA & Dec.
The little Seestar S50 continued to amaze with good images acquired in short exposures.

W.F.A.Ellison Telescope returns home

Read here for the final (?) chapter in the life of this historic telescope.
Here’s a link to the Armagh Observatory & Planetarium news release.

Promising new gearboxes
I’ve been using nema17 stepper motors with planetary gearboxes for all my telescope builds. They can have quite high backlash so for telescope drives I have recommended the high precision types that have about 20arc minutes of backlash in practice. This is divided by the final drive ratio, usually about 25:1 so you end up with about 1 arc minute at the telescope mount axis. Acceptable but noticeable.
Recently harmonic drive gearboxes have become more available for stepper motors. I havent seen a combined stepper and harmonic gearbox, so they must currently be bought seperately and joined. Quite easy to do.
I bought a couple of 30:1 harmonic gearboxes and installed one on a nema17 steppr I had spare. The build quality is good and although they are a little large than the standard planetary type, its not enough to be a problem.
They are specified as having less than10 arcseconds backlash, and the one I am testing has effectively none!
I would say they are a little bit more noisey than planetary types, but at tracking speeds and slow slewing they are quite enough.
I dont have a torque meter, but a simple test suggests the harmonic gearbox is a bit less efficient, with perhaps 15% less torque. probably not a problem for most, but needs to be considered.
Photo below of harmonic (on left) compared with a standard planetary.
Update as of 28 Nov 2024: I incorporated two of these into my 18” ‘Dobsonian’, replacing the conventional nema17 planetary gearboxes (high precision models). They outperform the conventional gearboxes by a long way. The lack of backlash leads to an extremely response drive - goto’s are more accurate and the fine joystick control is superb. Photos here and here.

Plate-Solvers Compared
Astrometry.net
My digital finder journey started out using astrometry.net as the core plate-solver. I could see it was being used by many others, both amateur and commercial, and it was easy to access from my own python code. It has proved very reliable with very few failures to solve and it even works when stars are barely visible to the eye. It is quite fast if you specify the pixel scale of the image accurately, and then blind solving is about the same speed as when an RA and Dec seed is given.
Tetra3
I’ve been monitoring others’ progress using Tetra3. I was told it can give very fast results, but needs extra work in preparing the database. Also it wasn’t as reliable as astrometry.net so I had no reason to change.
But then I started developing 'eFinder Lite’. Running on a Pi Zero 2 it really struggled with astrometry.net. 10 seconds to solve wasn’t unusual (compared with <1 second on a Pi5).
So I loaded up Tetra3 on to my test rig and started feeding it test images. For about a week I barely got a solve but then it all came together. Indeed the database needs to be built customised to your camera and lens. Then for a solve Tetra3 needs again accurate information about your image.
On a Pi5 I could get down to 200ms solve time, and on a PiZero2 about 2-3 seconds. Importanly, reliability was proving to be quite good.
Cedar-detect & Cedar-solve
I noticed that PiFinder uses cedar-detect & solve extension of Tetra3. Cedar is a suite of applications that can deliver a complete camera control, star extraction and plate-solve system. It is designed for speed and continuous solving at 10Hz is even possible, (or faster!). Additionally the author has optimised the database used by the solver too.
Installation of cedar-detect & solver isnt completely straightforward, but helpful instructions for migration from Tetra3 are given. The same requirements for careful generation of a bespoke database and args when calling cedar-detect are necessary.
Results are impressive. With the right images, total detect and solve time of around 12ms on a Pi5 are possible and 200ms on a Pi Zero2. I say 'right images' as the star detect process whilst extremely fast, is not as robust as Tetra3 or astrometry.net. Care must be taken to prevent stars saturating, but a simple exposure control can take care of that. For my eFinder focus utility, I need to revert to Tetra3 as cedar-detect cannot register out-of-focus stars, but utility is only used once per session at most and so Tetra3 is fine. Even with UK summer night skies, I’m getting reliable results with 0.1 second exposures on my Pi HQ camera.
Conclusions
For me it is ‘horses for courses’. Astrometry.net remains the most reliable solver, easy to integrate into my code and the on-line server is a useful asset. For my systems that use a Pi5 (ScopeDog and standard eFinder) I am in no hurry to change the plate-solver. No need. The second it takes to solve an image is not excesssive when part of the overall observing process.
Where speed is important or processing power is limited, then Tetra3 wins hands down. For most of these applications, using Cedar-Detect & Solver is an obvious choice. As shown by PiFinder, this opens up the prospect of replacing encoders with a digital finder, running faster than 1Hz. But take note of the stricter image quality requirements (although I suspect the author is working on this).
My eFinder Lite prototype is now reliably solving images in 0.2 seconds. Using the Pi Zero 2, the whole eFinder has just one cable. A USB to the Nexus DSC USB port. This provides power and data each way.
edited 31st July