Trying out a new Altitude drive
My 18” UC Dobsonian uses a toothed belt to drive both axes. The azimuth is neat and hidden below the base. The altitude drive is effective and efficient, but does look ‘unusual’! One of its great features is the adjustable slipe clutch - which is a priority for me.
I like the idea of the roller drives used by SpicaEyes and a few amateur builders. It drives both trunions together and could make the scope even more compact and easier to assemble. But could it incorporate a clutch and how well balanced does the scope need to be? Of course the answer is to build a prototype and experiment.
Here is the prototype. No base yet, just the telescope mirror and trunnion assembly sitting on the rollers, mounted on one of my workshop benches. Seems to work OK, but I need some decent rubber rollers. Heatshrink over plain bushes just doesnt work well!
Not installed yet is the actuator for the clutch. I’ll try it first as a straight friction-slip clutch but as a fall back I have a mechanism tested out to motorise it.
Real Time Computing challenges.
Re-writing ScopeDog into Python wasnt too difficult once I discovered the trick to getting a loop to maintain precise timing. If you’re interested, insert this into a while loop. This will ensure a precise 1 second period. (The rest of the loop can take a variable amount of time, as long as it is always less than 1 second.)
remain = 1-(time.time() % 1)
time.sleep(remain)
But once I started to connect and combine my eFinder and SkySafari, things got difficult. All three components, ScopeDog (the drive), eFinder (capture & plate-solving) and SkySafari (control and insatiable desire for position fixes!). Python wouldnt normally be used for real time computing applications, but it is very suited to astronomy calculations and nice to work with.
ScopeDog must maintain an exact 1Hz tempo to keep its tracking accurate, but this needs to pause cleanly when a goto, move or joystick actions is executed.
The eFinder needs time to get an image and solve it. This can take 2-5 seconds and may even fail.
SkySafari just solders on demanding positon fixes at least every second and throws an error if it doesnt get timely or well formatted answers.
Most issues were overcome by creating a separate Python thread for each of these three functions. This worked but still often one thread is waiting for results from another. This was then resolved by creating a 'virtual encoder’ scope position, shared by all threads. This positon is maintained by the 1Hz ScopeDog thread by using plate-solves results whenever available and computing a theoretical position inbetween times based on tracking and other scope moves.
Its working, just. At least well enough to try on the scope at night.
ScopeDog mk3 edges closer
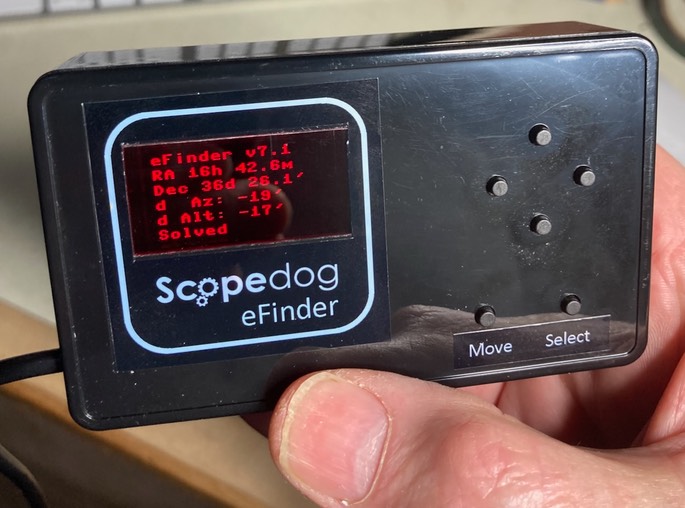
The digital finder is now working very nicely on my 18” Dobsonian. Celestron have a range of telescopes that use the technology to control their scopes, without the need for initial user alignments on reference stars. Would this work on my 18”?
A few quick experiments showed the concept is very viable. Without any initial alignment of my Dobsonian, I can push or drive the scope to a position, and within seconds the digital finder has worked out where it is pointing and sent the result to the ScopeDog drive to start tracking. This was done with some quick and dirty hack code. A proper solution is more difficult.
Currently ScopeDog uses Java but the plate-solving is most easily done with Python. Converting the java to python is proving to be fairly straightforward, and I am taking the opportunity to review some routines and make better use of ‘off the shelf’ astronomy code (PyEphem). Debugging is so much easier in Python too!
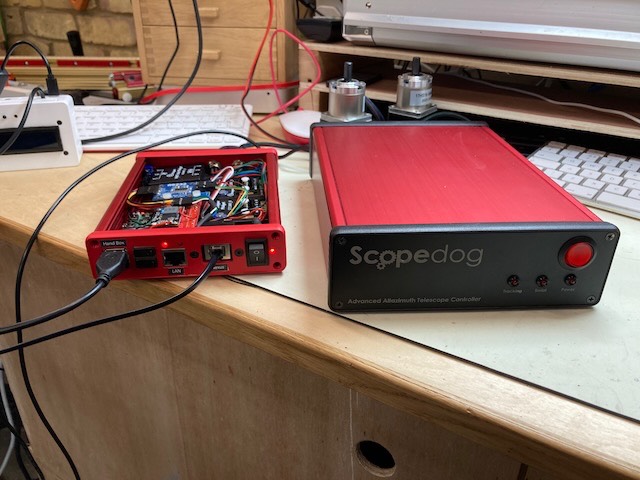
For now I am leaving the eFinder in its own box with dedicated Raspberry Pi. Eventually the eFinder code would go into the ScopeDog box - I’ve checked the Pi in there can cope with the extra workload. No Nexus DSC is needed (no encoders). Without a Nexus DSC, my ScopeDog needs its own gps dongle, and a direct connection to SkySafari running on a tablet or pc. These changes were easy although talking via code to SkySafari was a learning experience!
Anyone building their own ScopeDog (instructions start here) will be relieved to hear that the mk3 will be a firmware upgrade to a mk2. Realistically I need a year to fully complete and test the mk3, but if anyone wants to get involved early, contact me. (email on the first ScopeDog instructions page)
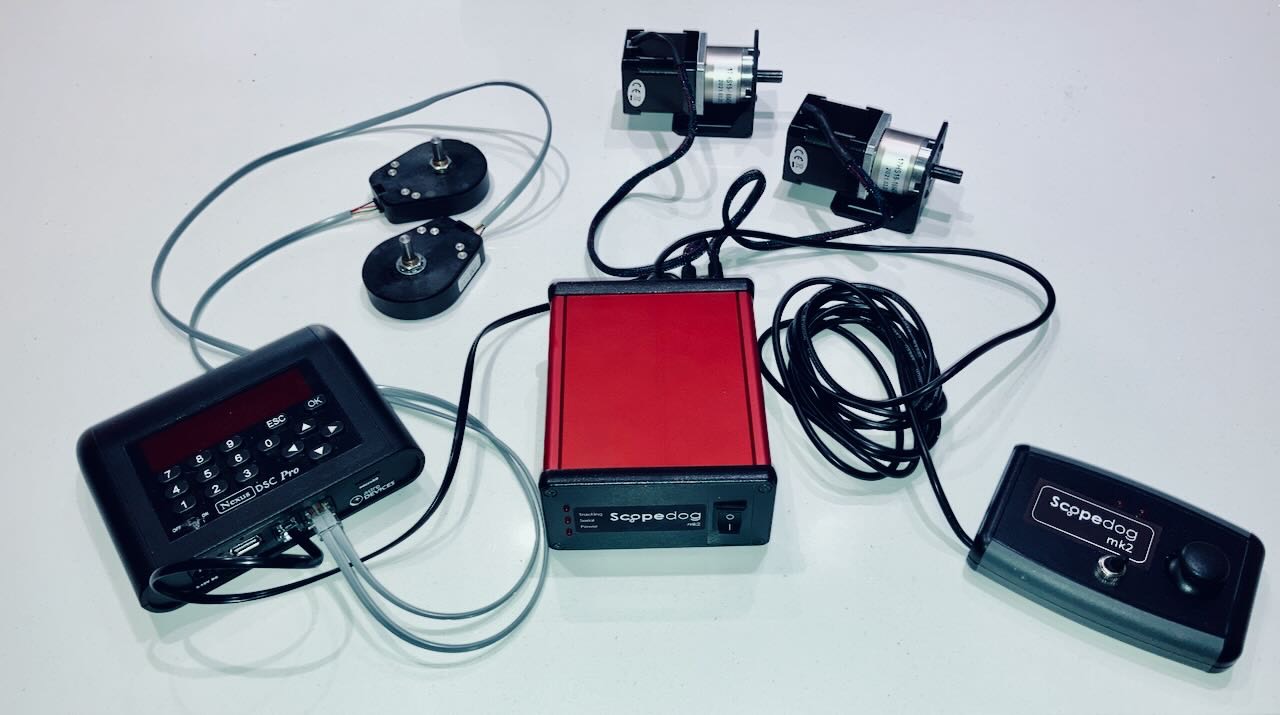
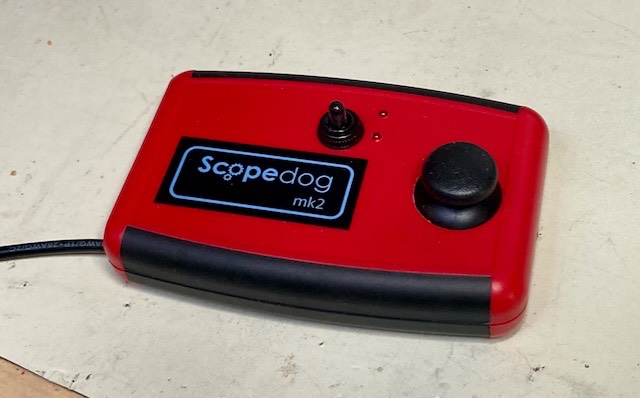
ScopeDog mk2 gets a new box
The previous box I used for ScopeDog mk2 required some tricky cutting and the overall construction wasn’t easy or neat.
A better search revealed a Hammond box that is perfect. Plastic end panels are available which allows the wifi to get through. Photos below include a comparison with the mk1.

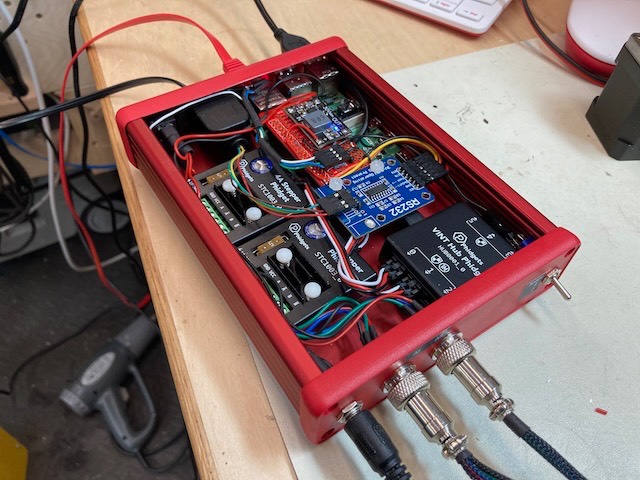
I do like the red finish, so the mk2 handbox got a refresh too
eFinder progress
After a year of experimenting with my eFinder I am still seeing new potentials. Most interesting is the possibility of replacing the usual encoder system on Dobsonian. This will deliver very high pointing accuracy, simplified initial alignment and less demands on main telescope mount build accuracy. The disadvantage is the lag in getting a position fix compared with the near instantaneous readout from encoders. I am currently exploring how this lag affects the observing experience (spoiler alert: not much!)
It will be relatively simple to integrate the eFinder code into the existing main ScopeDog control box. Even though I use SkySafari on a tablet, I still want a local display of telescope position and status (ie like the Nexus DSC display). I have just finished a prototype based on a Raspberry Pi Pico board and 1.3” OLED display. It connects to the main box via USB. Total cost about $20!
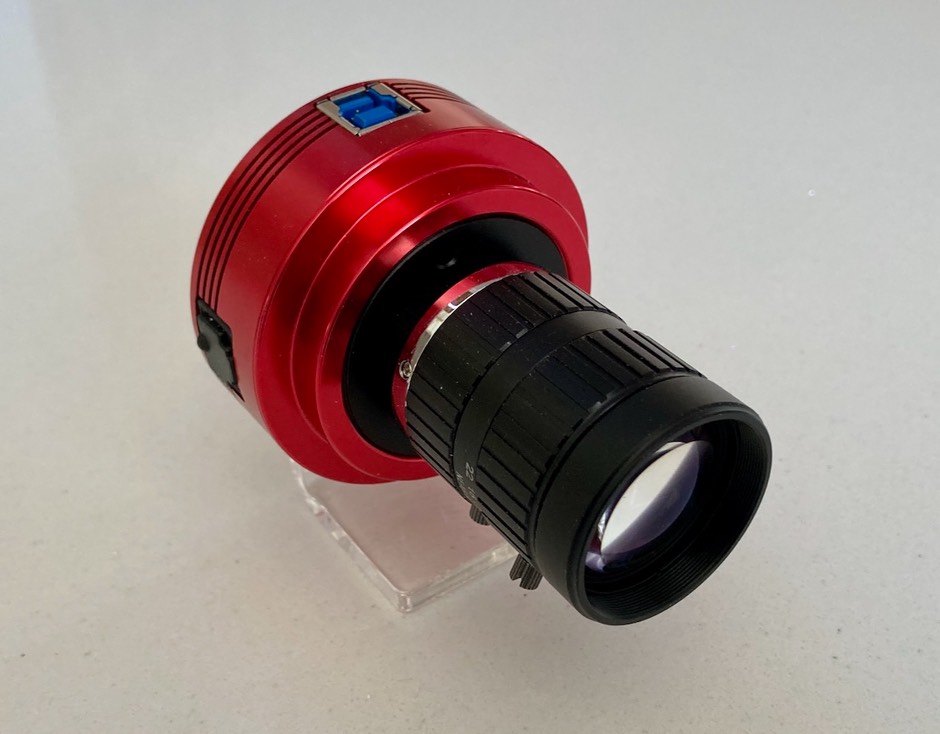
New eFinder scope solution
Been trying to help others build eFinders (aka Digital Finders). Biggest difficulty is finding a telescope or lens that has the right focal length and is fast, about 200mm f/2 would be ideal but really expensive.
A friend has a Starlight Lodestar guide camera which he wants to use and this has a ‘c-mount’ thread. This made me look at cctv lenses. I found a good 50mm f/1.8 lens and took the plunge and tried it.
It produces decent enough images in about 0.5 to 1 second exposures which is great. The field of view is 4 degrees on my camera which is bigger than I wanted but still means the pixel size in about 15 arc sec, so plenty of accuracy on plate-solves.
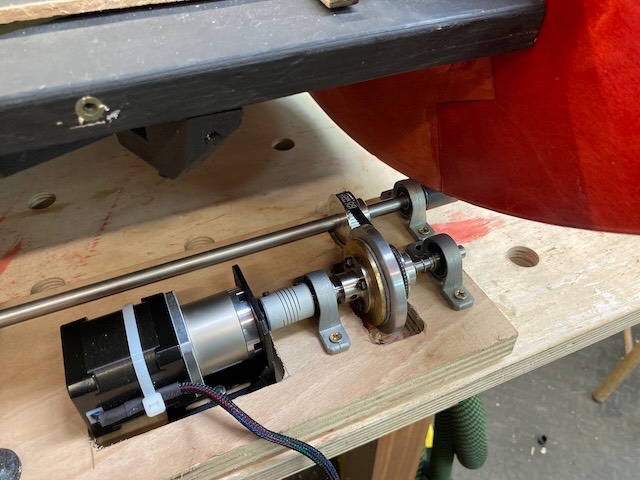
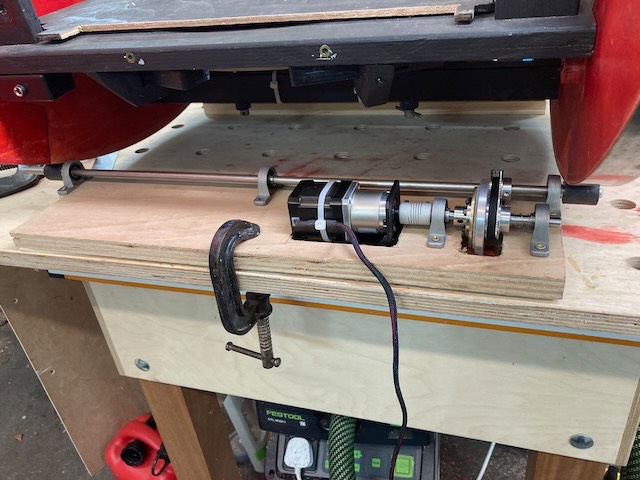
Telescope simulator
Debugging and commissioning telescope drives can be tiresome, especially if the scope is outside in the cold!
Made a mechanical simulator. Uses the same motors and encoders as the scope, with a brass worm gear coupling them to simulate the final mount gear reduction.

Then made a cover to hold the Nexus DSC & ScopeDog.
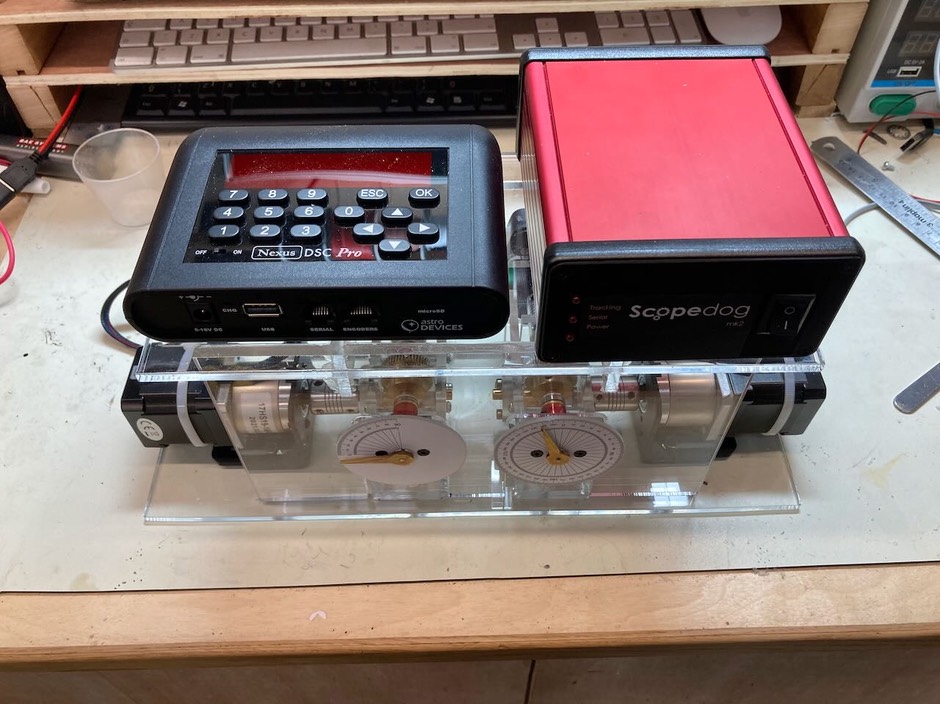
The acrylic was machine cut (router table with sled) and then flame polished.
ScopeDog goes into the wild
Big news (at least in the Dobsonian community!) is that ServoCat will no longer be available. This had to be the most widely used and available drive system for Dobsonian, both premium new builds and diy installations.
In response Craig and I have decided to release the design of our ScopeDog drive system for amateurs to use for their perosnal use. During COVID lockdown the ScopeDog design had been refreshed and is now much easier to make, plus it is about 1/4 the size.
If you are interested, head over to the new ScopeDog design pages, starting here.