The development followed a tortuous path while various solutions were tried.
I started with a Raspberry Pi HQ camera. It wasn’t ideal having very small pixels, but it is cheap and easy to drive from the RPi. Turned out to not have enough sensitivity.
The RPi is a RPi4 4GB, loaded with the Astroberry suite. This provides the standard Raspian Operating System (OS), a handy set of features to control the camera, and importanly it includes a built in local copy of Astrometry.net - which is the plate-solving solution I was going to use.
The guide scope started off as a Svbony SV106 50mm F4 unit. While mechanically sound (actually quite good), optically it was rubbish. Not helped by the manufacturers putting the objective in backwards! Even after correcting that the images were far too soft to be of any use. This was replaced for a while with a 50mm William Optics guide scope, which whist not so nice mechanically, but has very good optics.
Whist I could use Astroberry with its Kstars & Ekos modules to take images and try plate-solving, this wasnt going to be a route to the desired end product. This is because I didnt want a full display (just a button by the eyepiece and a text readout by the finder) and I wanted to use the plate-solve output to automatically ‘nudge’ my 18” Dobsonian right onto target after my existing GoTo had done 95% of the work. There will also be a “where am I now” mode where the eFinder will work out where it is pointing in the sky with no help form the Nexus DSc and not move the scope.
Thus the plate solving application had to talk to the Nexus DSC to find out where the scope ‘should’ be pointing (ie as a result of a SkySafari initiated GoTo) and then talk to my ScopeDog controller to move the scope.
I’ve never really done much programming, but now (in Covid lockdown) was good time to learn. Python was the obvious language as it is the default language for the RPi, plus many astronomy packages are available. There are many on-line tutorials which helped me get up to just about sufficient proficiency.
Preliminary testing indciates that platesolving with inputs from the Nexus DSC takes only a couple of seconds, whereas in “where am I now” mode it can take a while longer. The difference comes from the size and number of index files the program has to search through looking for a match.

First job was to talk to the Nexus DSC, without upsetting the existing serial comms with ScopeDog. Fortunately the Nexus DSC has a USB port which mirrored the serial port. WIth help from Serge at AstroDevices I was soon reading out the scope position data.
A bit complicated as the RPi USB ports are ‘hosts’ as is the Nexus DSC’s. Hosts dont talk to hosts, so I had to add a’device’ USB port coming off the RPi GPIO.
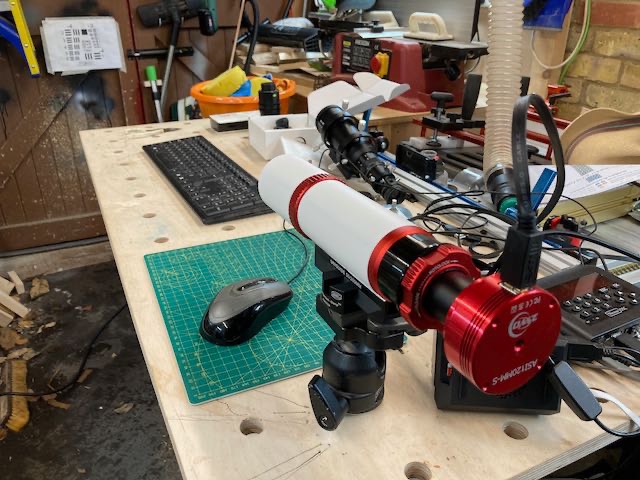
The WO 50mm guidescope shown here with the ZWO ASI120MM-S ccd, pointing at a target on the workshop wall.
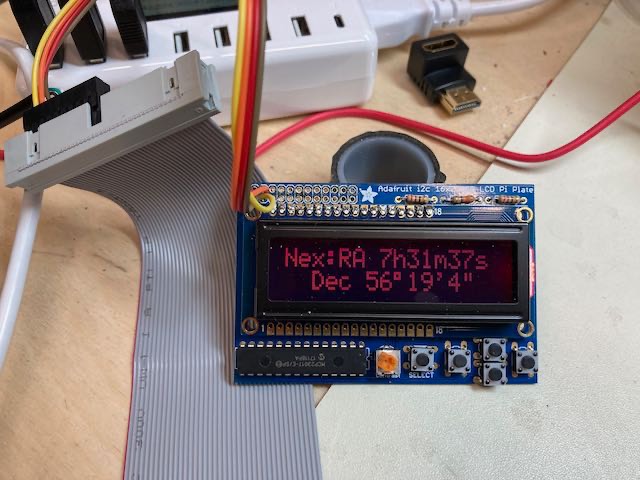
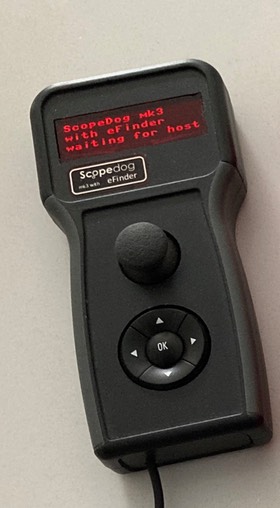
The two line display complete with 5 buttons. very convenient to interface with (RPi i2c bus).
It can show Nexus DSC output, plate-solved RA & Dec, delta Az & Alt, eFinder status and a mode for adjusting exposure, gain, etc.
If needed I will still be able to use a tablet to connect to the RPi via wifi and view images etc.
The Python code has been the biggest challenge for me. The languages I learnt at school and uni where nothing like the modern ones, plus I had to get into accessing hardware too. It took a while to come up with a structure that was right, and in the end the main program is just a loop reading the buttons and refreshing the two line display. This runs quickly and gives the buttons and display a responsive feel. Supporting the main loop are a large number of functions (sub-routines in old-speak!) that are called when needed. These are
Read the Nexus DSC output
This was more about learning how to use the RPi UART functions. Having read data from the Nexus DSC it was a case of parsing the result to extract the RA & Dec and get them ready for display and computations.
Capture an image
The RPi HQ ccd would have been relatively easy as the RPi OS now comes with built in access functions (Raspistill).
The ZWO ccd was much harder, but fortunately I discovered that a Steve Marple had written a Python ‘wrapper’ that handled the ZWO ccd API library.
Plate-solve an image
The documentation at astrometry.net is good, but the automatic installation within Astroberry wasnt obvious. Once I had discovered where the various modules were stored I could write some config instructions so that I could get the astrometry plate-solve to work from Python and bypass the Astroberry suite. The plate-solving within Astroberry is still functioning should I need it.
Move the telescope
So this module has to take the delta in RA & Dec, convert it to a delta in Az & Alt, and convert that to the required pulse lengths to move the scope the right delta Az & Alt. Just straight mathematics (if rather complex) for once. It then sends these to the Nexus DSC as LX200 style move commands.
Generate an image viewable over wifi from a tablet
The aim is to not need an external display, but I expect at first I will need to see the captured images to give me a clue as to the best settings for image capture and image plate-solving. The RPi has built in ‘vnc’ which allows it’s displays, keyboard and mouse functions to be accessed on almost any computer, tablet or phone, via wifi. In the field the RPi generates its own wifi hotspot. So this module is a simple routine to display the captured image on the RPi display.
I added a reticule to this display so the eFinder can be aligned with the main telescope.
Update: (Autumn 2020)
The eFinder has had a couple of nights under clear skies. I need more testing but its is doing what I wanted - positioning the telescope to within an arcmin or so. The confidence it gives is also amazing. Being able to know with 100% confidence exactly where the scope is pointing really makes for a good visual observing experience.
I realised I needed more access to the set up parameters and images during testing, so I wrote a graphical user interface (GUI) so that I can use a tablet to control and tweak the eFinder.
Another update (April 2021)
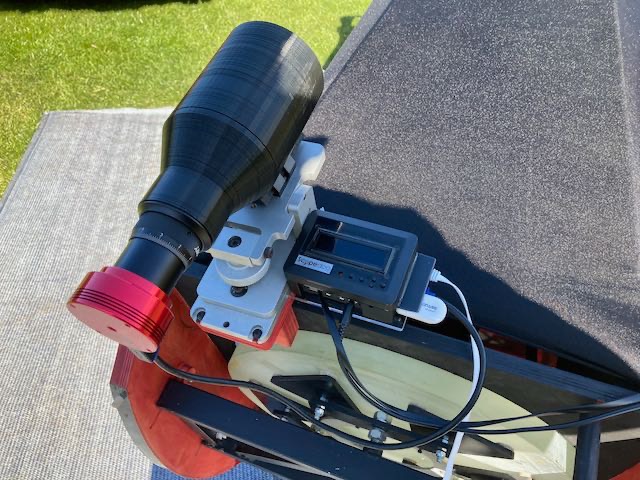
Bentley Ousley in Kansas has contacted me as he was trying to make a similar finder but was stuck on the code. We worked together with me producng a new version for his ServoCat driven 20” New Moon scope, and he made me a 3D printed 72mm f2.7 finder scope. The ASI120mm-S ccd and this f2.7 scope produces excellent images for plate-solving with just 1 second exposures.
After a week’s observing and testing the system is now working very nicely. Plate-solves are nearly 100% successful and the scope is moved to within an arc minute or two of the target position. I’ve even added a ‘auto-track’ mode whereby the eFinder continuously images - solves - and moves the scope.
Yet another update (March 2022)
A year of experimenting with the eFinder has taught me a lot.
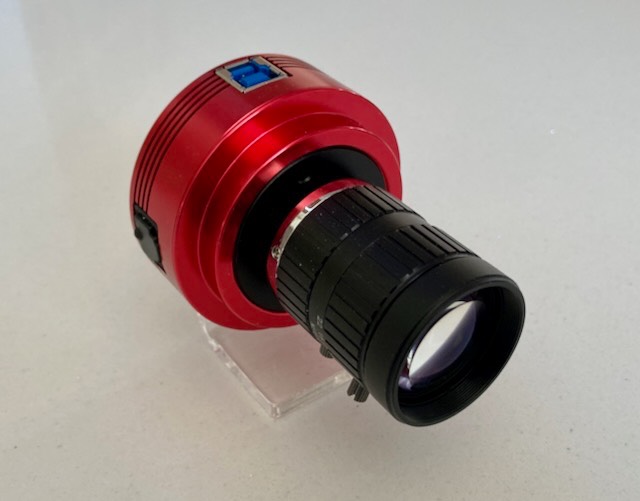
First the finder telescope - speed is paramount, quality too especially if an image is wanted for display. Field of view (ie focal length) needs to deliver enough resolution to ensure the desired pointing accuracy can be achieved. Currently I am using a commercial cctv lens 50mm focal length and f/1.8. This delivers a pixel size of 16 arc seconds which is good. At around $50 this is the most cost effective solution I have yet found.
A black waste pipe coupler makes a good dew shield.
Next step will be to combine the eFinder plate-solving functions into the main ScopeDog control box hardware. Progress on my blog pages.
Next, although I am currently using mine in conjunction with my Nexus DSC encoder system, I can see that digital finders could replace the encoders in some circumstances. The advantages are very high pointing accuracy, simplified initial alignment, and much less demands on main telescope mount precision. The disadvantage is the time lag to get a position fix, compared with the near instantaneous speed of encoders. I am currently seeing how this lag actually affects the observing experience (spoiler alert: not much!)
I am calling my ‘encoder less’ prototype a ‘ScopeDog mk4’. Without the Nexus DSC, I needed a local display of telescope position (although SkySafari is still the primary control mechanism). The mk3 handbox has all the display and controls I need. What is needed is my own 2-star alignment routine to dtermine initial scope orientation, including any mount tilt.
If anyone want to build their own copy - please contact me.